How to Redact a PDF in Preview on Mac (Not With a Black Box)
Updated 6 October 2026
Redact PDF: free, in your browser Black out names and numbers in a PDF for real: redacted pages are rebuilt so nothing is left underneath.To redact a PDF in Preview on a Mac, open it and choose Tools › Redact (or the Redact button in the Markup toolbar), select the text or drag over the area you want gone, then save and close. Apple says the redaction becomes permanent once the document is closed. Don’t use a black rectangle from Markup › Shapes instead: it covers the text without removing it.
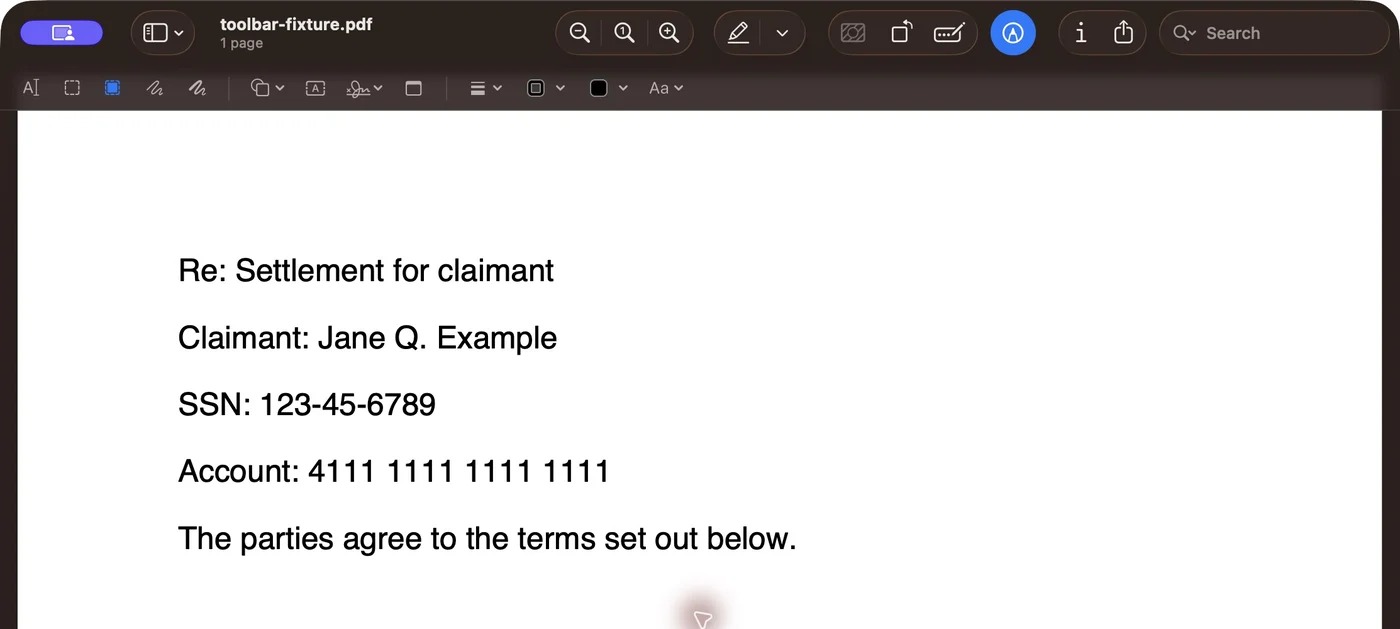
Both can cover the words on screen. Try both below: press copy with the black shape, then switch to Redact.
Re: Settlement for claimant
Claimant: Jane Q. Example
SSN: 123-45-6789
Account: 4111 1111 1111 1111
The parties agree to the terms set out below.
What you’d paste
A black rectangle in Preview hides nothing
Preview uses PDFKit, Apple’s own PDF framework. We used PDFKit to add a black-filled rectangle annotation, the same kind of object Markup › Shapes › Rectangle creates, over the name, Social Security number and card number in a test letter. Then we saved it and extracted the text.

All three values came straight out. The rectangle is an annotation: a separate object sitting on top of the page, which anyone can select and delete, and which does nothing to the text underneath. We also reproduced this with real Preview shapes in the test below. Setting a black fill triggered this warning:
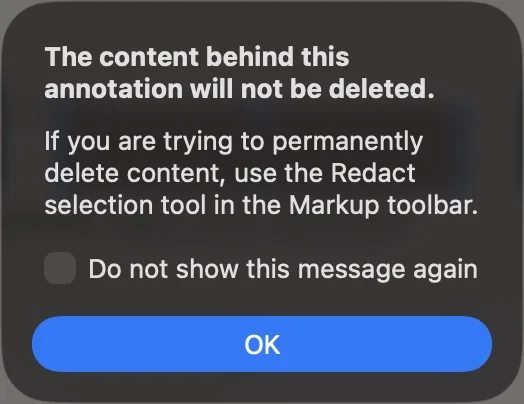
Preview tells you, then lets you carry on. Try our sample file: open it, press Cmd+A, Cmd+C, and paste into TextEdit.
“Print to PDF” doesn’t fix it
Apple’s Preview guide explains that choosing File › Print › Save as PDF flattens annotations so they can no longer be edited. That stops someone deleting the rectangle, but flattening isn’t redacting. The box is merged into the page, and the text is still on the page underneath it. Our test below confirms it in Preview: all three values survived. Printing also adds a leak of its own: Preview’s Save as PDF dialog filled in the Mac account’s name as the author. In our six-method PDF test, a black box annotation that was flattened still gave up all three hidden values to a copy and paste.
We tested Preview’s Redact tool
On 6 October 2026, we tested Preview 11.0 on macOS 26.5.1 (build 25F80) with the fake values Jane Q. Example, 123-45-6789 and 4111 1111 1111 1111, using pdf.js to check copyable text and Ghostscript to check page text anywhere in the file, including outside the visible page.
Each count is how many of those three values survived, not how many times they appeared. The extraction counts exclude metadata; the Author column checks that separately. These are small test fixtures, not a check of every kind of hidden PDF content.
| Test | Looks redacted? | Copyable (copy) | Anywhere in file | Author kept? |
|---|---|---|---|---|
| T1: Redact selected text | Yes | 0/3 | 0/3 | Yes |
| T2: Redact area rectangles | Yes | 0/3 | 0/3 | Yes |
| T3: Save, still open (snapshot) | Yes | 0/3 | 0/3 | Yes |
| T3: After closing | Yes | 0/3 | 0/3 | Yes |
| T4: Every match on two pages | Yes | 0/3 on each page | 0/3 | Yes |
| T5: Black Markup shapes | Yes | 3/3 | 3/3 | Yes |
| T6: Shapes, then Print › Save as PDF | Yes | 3/3 | 3/3 | Not assessed* |
| T7: Purple highlights | No, text is legible | 3/3 | 3/3 | Yes |
| T8: Visible part of an off-page line | Yes | 0/3 | 1/3: SSN | Yes |
| T9: Export with PDF selected | Yes | 0/3 | 0/3 | Yes |
*Print’s save dialog supplied the Mac account name as Author. We cleared it before saving the fake fixture. T9 used File › Export, with PDF selected, because Export as PDF was disabled. We checked that export before closing its working copy.
- Off-page text still leaked. In T8, we redacted all the visible text on the overflowing line and the visible claimant name. Copy extraction found nothing, but Ghostscript recovered 123-45-6789 beyond the right edge. Black shapes and printed shapes also leaked all three values.
- Redact kept the Author. Every Redact output still named Jane Q. Example in metadata. T1’s actual copy-and-paste into TextEdit contained only the heading, labels and final sentence, so that check alone would miss the Author and T8’s off-page leak.
- Save and Export were clean for selected page text. T3’s saved snapshot was clean while still open and after closing. T2 showed no letter fragments at 400% zoom when we drew with a small margin. The crossed pattern remained visible after reopening; its appearance alone does not tell you whether the text is gone.
Which Preview tool actually removes text?
Preview’s Markup toolbar has several tools that can make text look blacked out. Only one of them is a redaction tool; Apple lists the rest as annotations, which sit on top of the page and leave it unchanged.
| Preview tool | What it does to the text underneath | Safe for redaction? |
|---|---|---|
| Redact (Tools › Redact) | Removed selected visible text in our saved test files | Check hidden text and metadata too |
| Shapes › Rectangle, filled black | Nothing. The rectangle is a separate object on top | No |
| Highlight, set to a dark colour | Nothing. The highlight is an annotation over the text | No |
| Text box with a black background | Nothing. It covers the text and can be moved | No |
| Signature or sketch scribbled over it | Nothing. It is a drawing on top | No |
| Any of the above, then File › Print › Save as PDF | Flattens the cover into the page; the text is still underneath | No |
If it isn’t the Redact tool, it isn’t redaction.
How to redact in Preview, step by step
-
Make a copy first. In the Finder, select the PDF and press Cmd+D. Redaction in Preview is permanent once you close the file, so keep the original somewhere safe.
-
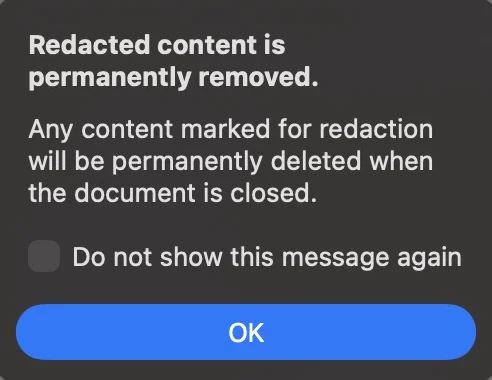
Open the copy in Preview and choose Tools › Redact. Preview displays: “Redacted content is permanently removed. Any content marked for redaction will be permanently deleted when the document is closed.” Click OK. The same tool is available in the Markup toolbar.
-
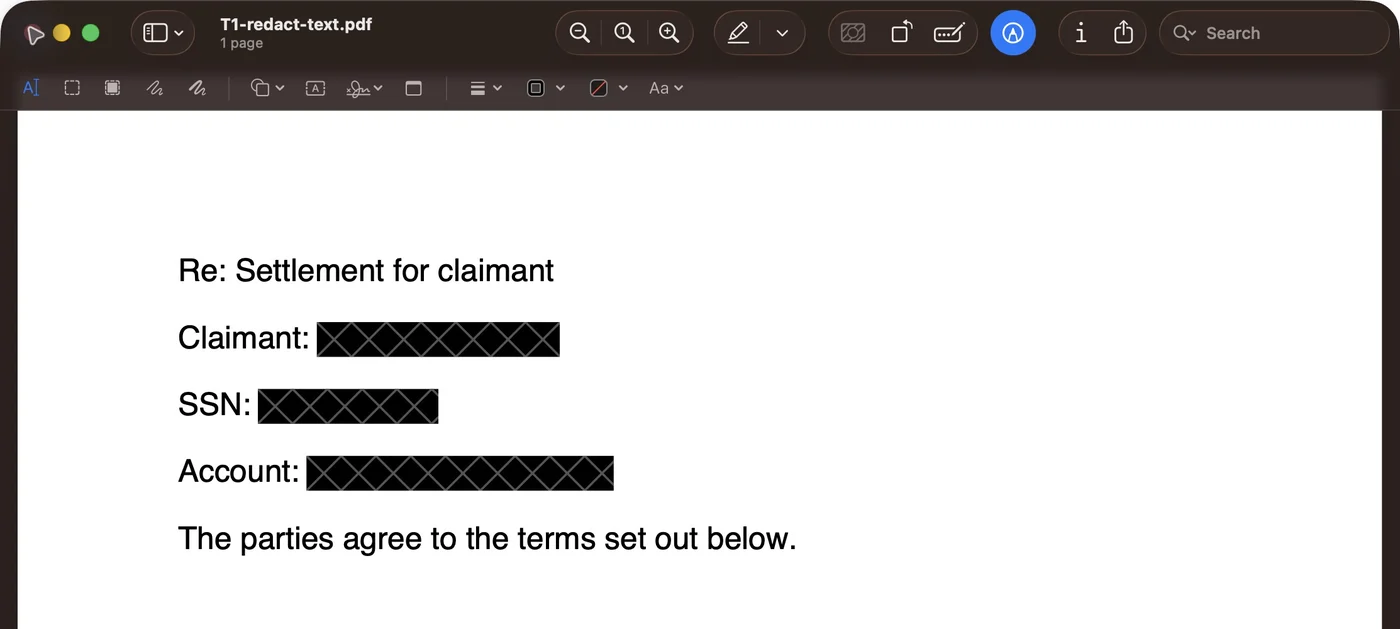
Select what to remove. Drag across text to redact it, as if you were highlighting it. Drag over a picture, signature or any other area to redact that part of the page. Text selections show black boxes with a repeated crossed pattern; area rectangles show a large X. In Preview 11.0 on macOS 26.5.1, that pattern remained after we saved, closed and reopened the file.
-
Find every occurrence. Press Cmd+F and search for each name and number. Preview lists every match; redact each one, including the ones on later pages.
-
Save and close. Choose File › Save, then close the document. Apple says you can change redactions while editing and that they become permanent when you close the document. Our saved snapshot was already clean before closing, but still close and reopen your file to check the version you will send.
That’s all Apple’s tool needs. The part Apple leaves to you is checking the result.
Save, Export or Print?
How you save matters for markup. According to Apple’s guide, File › Save, File › Export and Export as PDF keep annotations editable, while File › Print › Save as PDF flattens them into the page. In our Redact test, an explicitly saved file was clean before closing. File › Export, with PDF selected, was also clean before closing. We did not test every export option. Apple says redactions become permanent when you close the document, so save normally, close, and reopen the file to check it.
Scanned pages and pictures
A scanned page is a picture of text, so there may be nothing to select. Use the Redact tool’s drag instead: drag a box over the area, as you would over a photo or a signature, and Preview removes that part of the image, as MacMost demonstrates. Many scans also carry an invisible text layer added by text recognition, so after redacting an area, run the copy-and-paste check below to make sure no hidden text came along. On a scan with no text layer, though, that check comes back clean whether or not you redacted anything, so zoom in and look at every page.
What Preview’s Redact doesn’t catch
Preview removes what you select. Three things are easy to miss:
- Table-of-contents links. Apple notes that if the PDF has a table of contents, entries in it that link to redacted text aren’t removed. A chapter called “Statement of Jane Q. Example” still says so.
- Text outside the page. Howard Oakley of The Eclectic Light Company found this problem in 2020. Our test confirms it on macOS 26.5.1: the visible line was redacted, but the off-page SSN survived. A normal copy-and-paste check missed it; our Unredact PDF checker finds it. Oakley also saw letter fragments around redacted areas; we saw none at 400% in our small area test with a margin. Keep that margin and inspect your own edges.
- Everything that isn’t on the page. Redact works on what you can see. Our Redact outputs kept Jane Q. Example in the Author field. The file’s author and title, bookmarks, attachments and the file name are separate. Check them in Tools › Show Inspector, and run the PDF through our PDF metadata remover to see and strip what’s stored inside.
Example: a bank statement for a landlord
The most common reason to redact on a Mac is a document someone asked for, like a bank statement to prove your income, where they need some of it and nothing else. A reasonable cut:
- Keep: your name, the bank’s name, the statement period, the deposits that show your income, and the closing balance if they asked for it.
- Redact: the account number and routing or sort code, except the last four digits, which is the convention US federal courts use for account numbers. Also redact your full address if they already have it, and any transactions that aren’t theirs to see, such as medical payments or transfers to family.
- Watch for repeats. Statements print the account number on every page, and often in a footer or barcode. Search for it with Cmd+F and redact every match, then drag over any barcode or QR code, which can encode the same number.
Then save, close, reopen and run the checks below. It takes a minute, and it’s the minute that catches the account number on page four.
Check the redacted PDF before you send it
- Open the saved file, press Cmd+A then Cmd+C, and paste into TextEdit. If any redacted word appears, it isn’t redacted. A clean paste is only a first check: it missed the off-page SSN in our test.
- Press Cmd+F in Preview and search for each redacted name or number. There should be no matches.
- Open Tools › Show Inspector and check the author, title and keywords.
- Or drop the file on our free Unredact PDF checker. It shows any text hiding under a black box, and also text placed beyond the page edge: it flagged the off-page SSN from our test that a copy and paste missed. It runs in your browser, like everything on this site.
On iPhone or iPad
The Markup tools on iPhone and iPad don’t include a redaction tool, according to iDownloadBlog (last updated in 2026). Drawing a black shape there has the same problem as on the Mac. Use a dedicated redaction tool instead.
When to use something else
Preview is free and removed the selected visible text in our tests. Its off-page leak and retained Author mean you still need to check hidden content before sharing, even for an everyday document. Reach for something else when:
- The document matters. For a court filing or anything a journalist might read closely, Oakley’s advice was Adobe Acrobat, which he called the only reliable redaction tool, while adding that he had doubts even there. Another approach is a tool that rebuilds each redacted page as an image so there is no text left at all. Our Redact PDF tool does that: it finds emails, phone, card and ID numbers automatically, lets you drag over anything else, rebuilds each redacted page as an image, and checks the new file for the hidden values before you save it. It runs in your browser, so the PDF is never uploaded.
- You are not on a Mac. Preview is Mac-only; our guide to redacting a PDF covers Windows and every other option.
- You want Acrobat. Adobe Acrobat Pro runs on the Mac too, and its redaction tool includes a sanitize step that removes hidden information such as metadata and comments as well. Our PDF redaction guide has the steps.
- The original is a Word file. Redact it before it becomes a PDF; here’s how to redact in Word.
Questions
Can I redact in Mac Preview?
Yes. Open the PDF in Preview and choose Tools › Redact, or the Redact button in the Markup toolbar, then select text or drag over an area. Apple says the redaction becomes permanent once you close the document. It has been part of Preview since macOS Big Sur, according to Macworld.
Why is Redact not available in Preview?
Check three things: that the Mac runs macOS Big Sur or later, that the file is a PDF (Apple documents Redact as one of the tools for annotating PDFs), and that the PDF isn’t password-protected or restricted from editing, which can block markup. For a screenshot or photo, use an image tool instead, such as our free screenshot redactor, which burns solid boxes into the picture.
How do I black out text on my MacBook?
In a PDF, use Preview’s Tools › Redact, not a black rectangle from Markup › Shapes. A rectangle is a separate layer over the text: it looks redacted, but the words underneath can still be selected and copied. Redact removes the text from the file.
Is Preview’s redaction safe?
Mostly. In our test on macOS 26.5.1, Redact removed every value we selected, even before the file was closed. But it kept the author name in the file, and text running off the edge of the page survived. Check the file’s properties and the edges of each page, not just a copy and paste, before you send it.